Ansible: How we prepare the vSphere instances of the VMware CI
As briefly explained in CI of the Ansible modules for VMware: a retrospective, the Ansible CI uses OpenStack to spawn ephemeral vSphere labs. Our CI tests are run against them.
A full vSphere deployment is a long process that requires quite a lot of resources. In addition to that, vSphere is rather picky regarding its execution environment.
The CI of the VMware modules for Ansible runs on OpenStack. Our OpenStack providers use KVM-based hypervisors. They expect images in the qcow2 format.
In this blog post, we will explain how we prepare a cloud image of vSphere (also called a golden image).
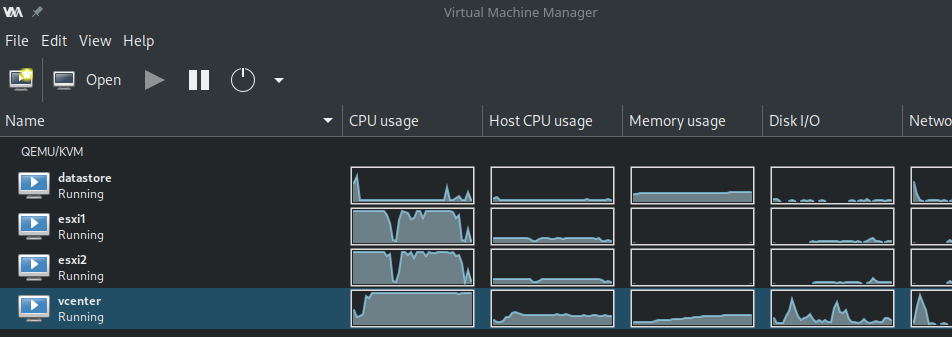 a full lab running on libvirt
First, get a large ESXi instance
The vSphere (VCSA) installation process depends on an ESXi. In our case, we use a script and Virt-Lightning to prepare and run an ESXi image on Libvirt. But you can use your own ESXi node as long as it meets the following minimal constraints:
- 12GB of memory
- 50GB of disk space
- 2 vCPUs
Deploy the vSphere VM (VCSA)
For this, I use my own role called goneri.ansible-role-vcenter-instance. It delegates the deployment to the vcsa-deploy command. As a result, you don't need any human interaction during the full process. This is handy if you want to deploy your vSphere in a CI environment.
At the end of the process, you've got a large VM running on your ESXi node.
In my case, all these steps are handled by the following playbook: https://github.com/virt-lightning/vcsa_to_qcow2/blob/master/install_vcsa.yml
Tune-up the instance
Before you shut down the freshly created VM, you would like to make some adjustments. I use the following playbook for this: prepare_vm.yml
During this step, I ensure that:
- Cloud-Init is installed,
- the root account is enabled with a real shell,
- the virtio drivers are available
Cloud-Init is the de-facto tool that handles all the post-configuration tasks that we can expect from a Cloud image: inject the user SSH key, resize the filesystem, create a user account, etc.
By default, the vSphere VCSA comes with many disks, which is a problem in a cloud environment where an instance is associated with a single disk image. So I also move the content of the different partitions to the root filesystem and adjust the /etc/fstab to remove all the references to the other disks. This way I will be able to maintain only one qcow2 image.
All these steps are handled by the following playbook: prepare_vm.yml
Prepare the final Qcow2 image
At this stage, the VM is still running, so I shut it down. Once this is done, I extract the raw image of the disk using the curl command:
curl -v -k --user 'root:!234AaAa56' -o vCenterServerAppliance.raw 'https://192.168.123.5/folder/vCenter-Server-Appliance/vCenter-Server-Appliance-flat.vmdk?dcPath=ha%252ddatacenter&dsName=l
ocal'
root:!234AaAa56is my login and passwordvCenterServerAppliance.rawis the name of the local file192.168.123.5is the IP address of my ESXi- vCenter-Server-Appliance is the name of the vSphere instance.
vCenter-Server-Appliance-flat.vmdkis the associated raw disk
The local .raw file is large (50GB), so ensure you've got enough free space.
You can finally convert the raw file to a qcow2 file. You can use Qemu's qemu-img for that, it will work fine but the image will be monstrously large. I instead use virt-sparsify from the libGuestFS project. This command will reduce the size of the image to the bare minimum.
virt-sparsify --tmp tmp --compress --convert qcow2 vCenterServerAppliance.raw vSphere.qcow2
Conclusion
You can upload the image in your OpenStack project with the following command:
openstack image create --disk-format qcow2 --file vSphere.qcow2 --property hw_qemu_guest_agent=no vSphere
If your OpenStack provider uses Ceph, you will probably want to reconvert the image to a flat raw file before the upload. With vSphere 6.7U3 and before, you need to force the use of a e1000 NIC. For that, add --property hw_vif_model=e1000 to the command above.
I've just done the whole process with vSphere 7.0.0U1 in 1h30 (Lenovo T580 laptop). I use the ./run.sh script from https://github.com/virt-lightning/vcsa_to_qcow2, which automates everything.
The final result is certainly not supported by VMware, but we've already run hundreds of successful CI jobs with this kind of vSphere instances. The CI prepares a fresh CI lab in around 10 minutes.